How To Map A Drive In Windows 7
If you're looking for how to map a drive in windows 7 images information linked to the how to map a drive in windows 7 keyword, you have pay a visit to the right blog. Our website always gives you hints for seeing the maximum quality video and picture content, please kindly surf and find more enlightening video content and images that fit your interests.
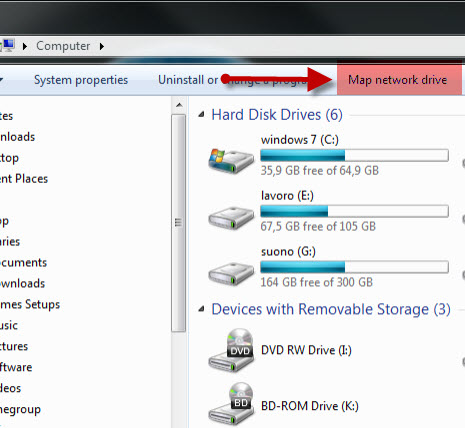
How To Map A Drive In Windows 7. Select this pc > computer tab > map network drive. In the map network drive window, click the drive letter from the dropdown list adjacent to drive.
Mapping a drive means you assign a drive letter on your computer to a server path. To map a network drive in windows 10 or windows 8: It can be any letter in the list, depending on your personal preference.
2) click on the windows icon and the ‘computer’ option on the right hand side.
Select start > computer > map network drive. There is no option to map the network drive for all users at one go. Mapping a drive means you assign a drive letter on your computer to a server path. The map network drive window will appear.
If you find this site {adventageous|beneficial|helpful|good|convienient|serviceableness|value}, please support us by sharing this posts to your {favorite|preference|own} social media accounts like Facebook, Instagram and so on or you can also {bookmark|save} this blog page with the title how to map a drive in windows 7 by using Ctrl + D for devices a laptop with a Windows operating system or Command + D for laptops with an Apple operating system. If you use a smartphone, you can also use the drawer menu of the browser you are using. Whether it's a Windows, Mac, iOS or Android operating system, you will still be able to bookmark this website.